Enable SSO with Keycloak
Keycloak is an open-source Identity and Access Management (IAM) tool, primarily used for simplifying the authentication and authorization processes in modern applications and services. It provides a wide range of features including Single Sign-On (SSO), two-factor authentication, and social login capabilities. Keycloak is designed to manage users, credentials, roles, and groups efficiently, enabling developers to secure their applications and services with minimal additional coding. Keycloak supports various industry-standard protocols like OpenID Connect, OAuth 2.0, and SAML 2.0, facilitating integration with a multitude of platforms and services.
You can integrate Keycloak with Palette to enable SSO for your users. This guide will walk you through the steps to set up Keycloak as an OIDC provider for Palette.
Prerequisites
-
Access to Palette as a Tenant Admin.
-
The Keycloak service must be exposed on an external IP address, preferably with a domain name. Refer to the Configuring Keycloak for production guide for more information.
-
Deploy a Kubernetes cluster with load balancer resources available. You will also need a set of open IP addresses for the Keycloak service.
You can deploy a Kubernetes cluster in a public cloud with load balancer resources using Palette. You can also deploy to an on-prem or edge environment and use the MetalLB pack to expose a load balancer service. Check out the Deploy a Cluster guide for more information.
- Kubectl installed and configured to access your Kubernetes cluster.
Setup
-
Ensure you can access your Kubernetes cluster using the kubectl CLI. Refer to the Access Cluster with CLI for guidance on how to access your cluster with the
kubectlCLI. -
Install Keycloak on your Kubernetes cluster using the default configurations. This will create a Keycloak deployment and a service of the LoadBalancer type. The service will be exposed on an external IP address.
kubectl create --filename https://raw.githubusercontent.com/keycloak/keycloak-quickstarts/latest/kubernetes/keycloak.yamlinfoYou can also download the YAML file and edit it to suit your requirements before deploying it to your cluster. If you choose to do so, replace the GitHub file link in the original command with a file path to your YAML file.
-
The installation process takes a couple of minutes. After installation completes, use the following command to retrieve the external IP address of the Keycloak service.
kubectl describe service keycloak  | grep "LoadBalancer Ingress" | awk '{print $3}' && \
IP=$(kubectl describe service keycloak | grep "LoadBalancer Ingress" | awk '{print $3}')
aacf4014d5cd34825803567201217410-1398304919.us-east-1.elb.amazonaws.com -
Next, download the Ingress YAML definition provided by Keycloak to create an Ingress resource in your cluster. The command below also automatically replaces the
KEYCLOAK_HOSTplaceholder with the external IP address of the Keycloak service.wget --quiet --output-document - https://raw.githubusercontent.com/keycloak/keycloak-quickstarts/latest/kubernetes/keycloak-ingress.yaml | sed "s/KEYCLOAK_HOST/$IP/" | kubectl create -f -ingress.networking.k8s.io/keycloak createdinfoIf
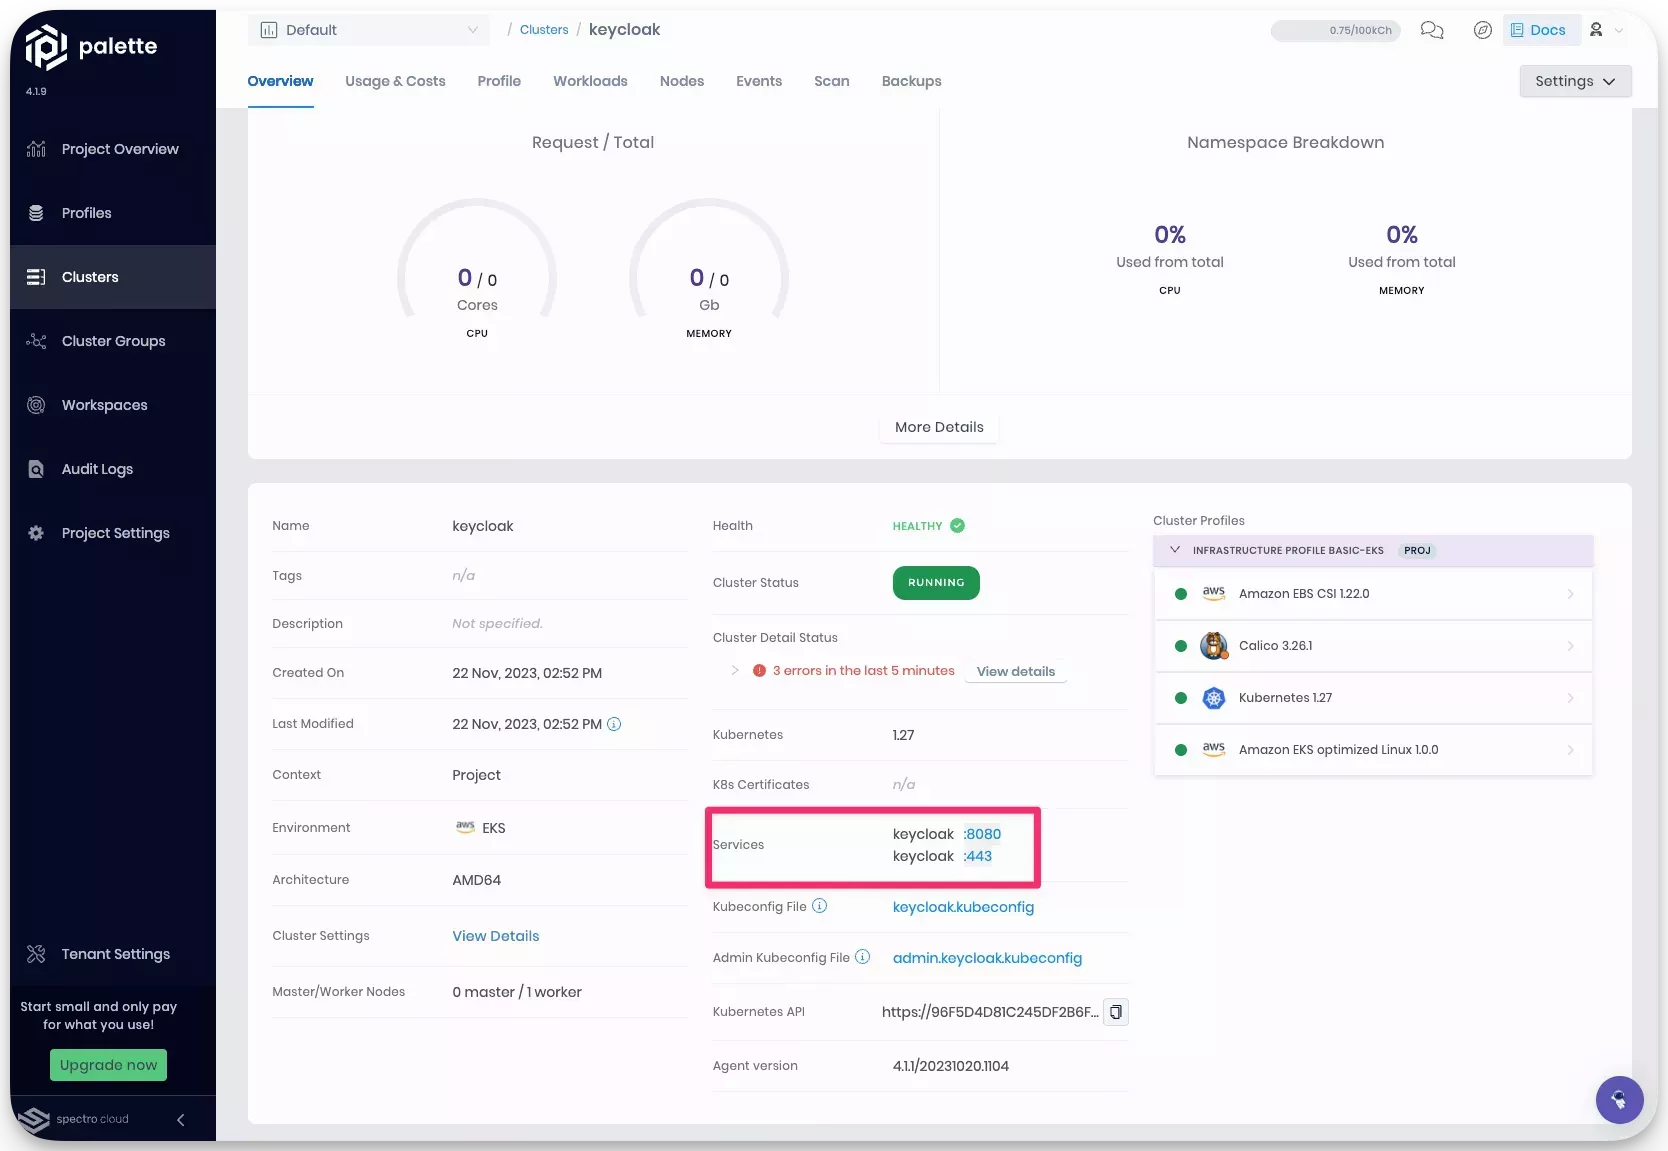
wgetandsedare not available, download the file and manually edit the file to replaceKEYCLOAK_HOSTwith the external IP address of the Keycloak service.After the ingress resource is created, the following services will be available in your cluster. You can review the exposed services in the cluster details page.
-
Create a DNS CNAME record for the URL exposed by load balancer. For example, the CNAME
keycloak.dmitry.sa.spectrodemos.compoints to the following URL exposed by the load balanceraacf4014d5cd34825803567201217410-1398304919.us-east-1.elb.amazonaws.com. -
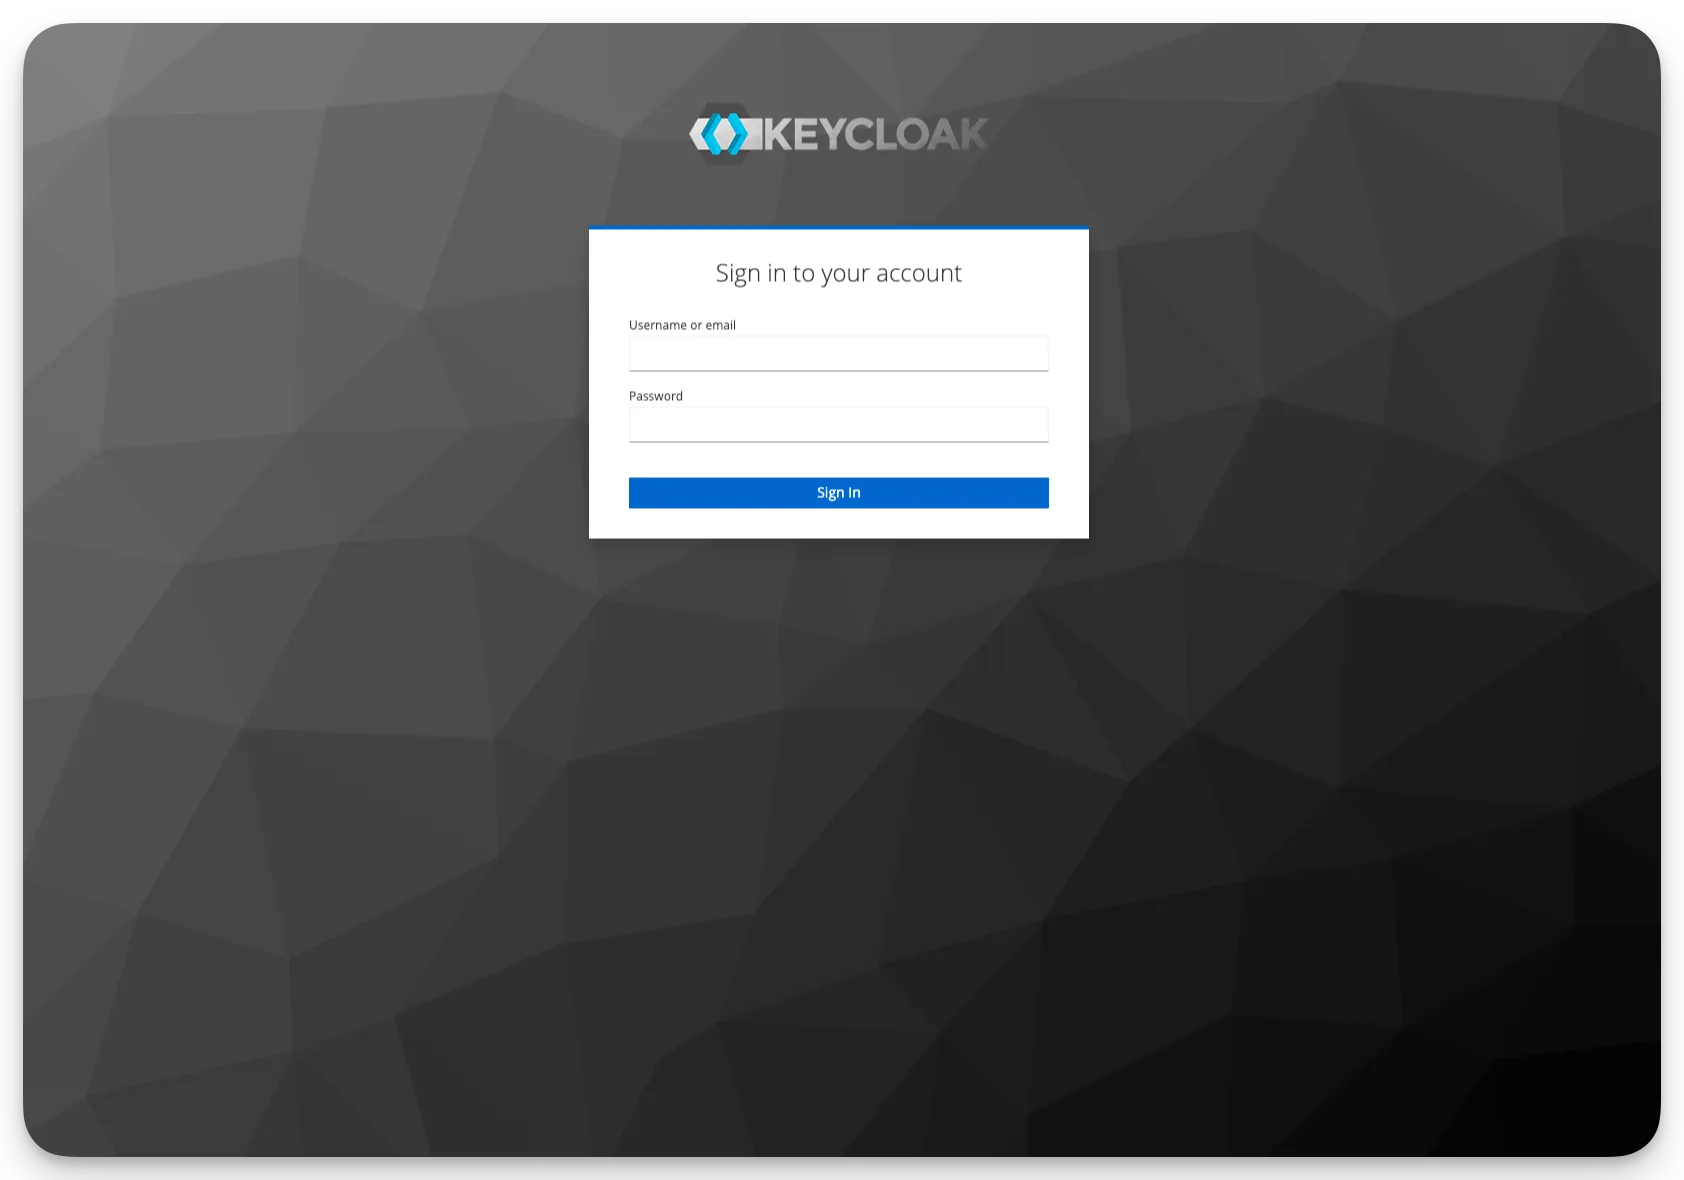
Log in to Keycloak with by using the domain name you created in the previous step, or you can use the exposed load balancer URL. The Keycloak admin console is available on port
8080/admin. For example,http://keycloak.dmitry.sa.spectrodemos.com:8080/admin. Use the default credentialsadmin:adminto log into the admin console.warningWe recommend that you change the default credentials after logging in to the admin console.
-
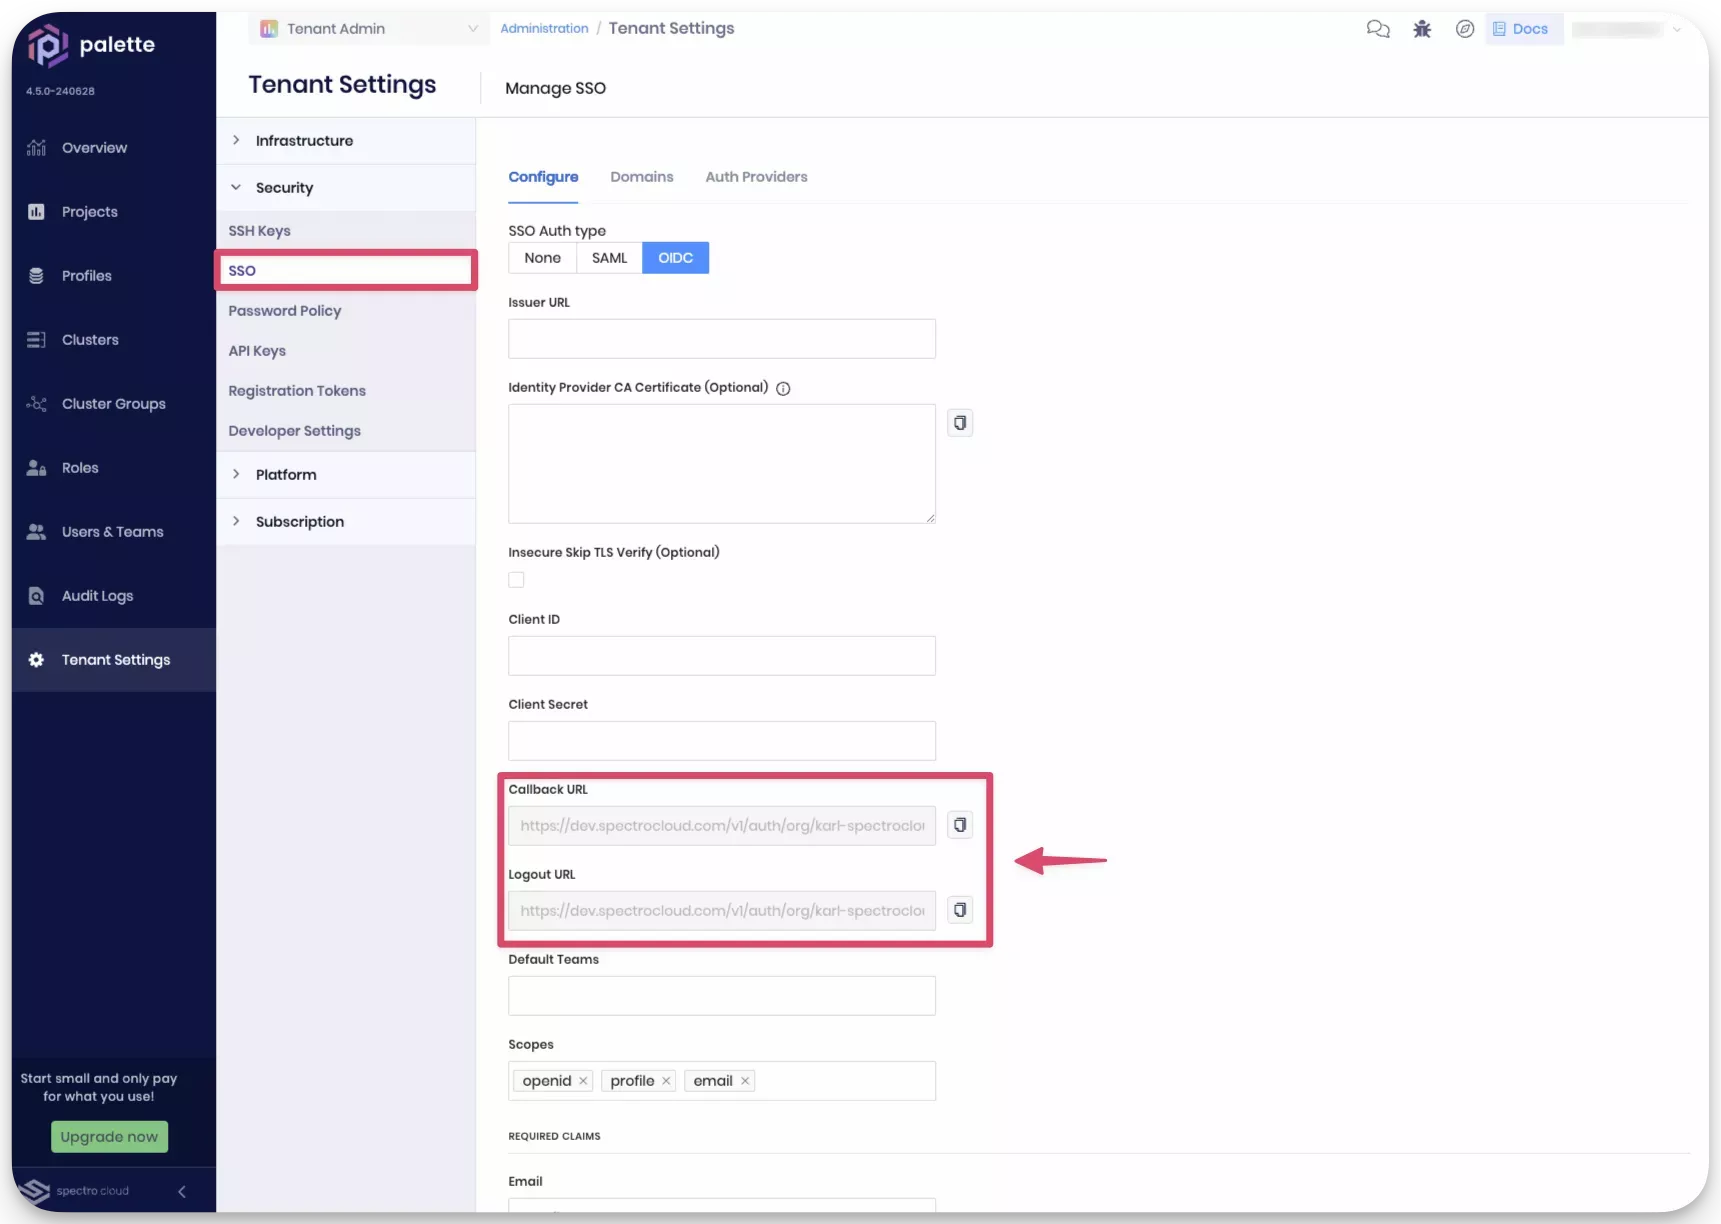
Next, log in to Palette, and navigate to the left Main Menu and select Tenant Settings. Next, select SSO from the Tenant Menu to access the SSO configuration page. Click on the OIDC tab to configure OIDC for Palette. Copy the values in the Callback URL and Logout URL fields. You will need these values to configure Keycloak.
-
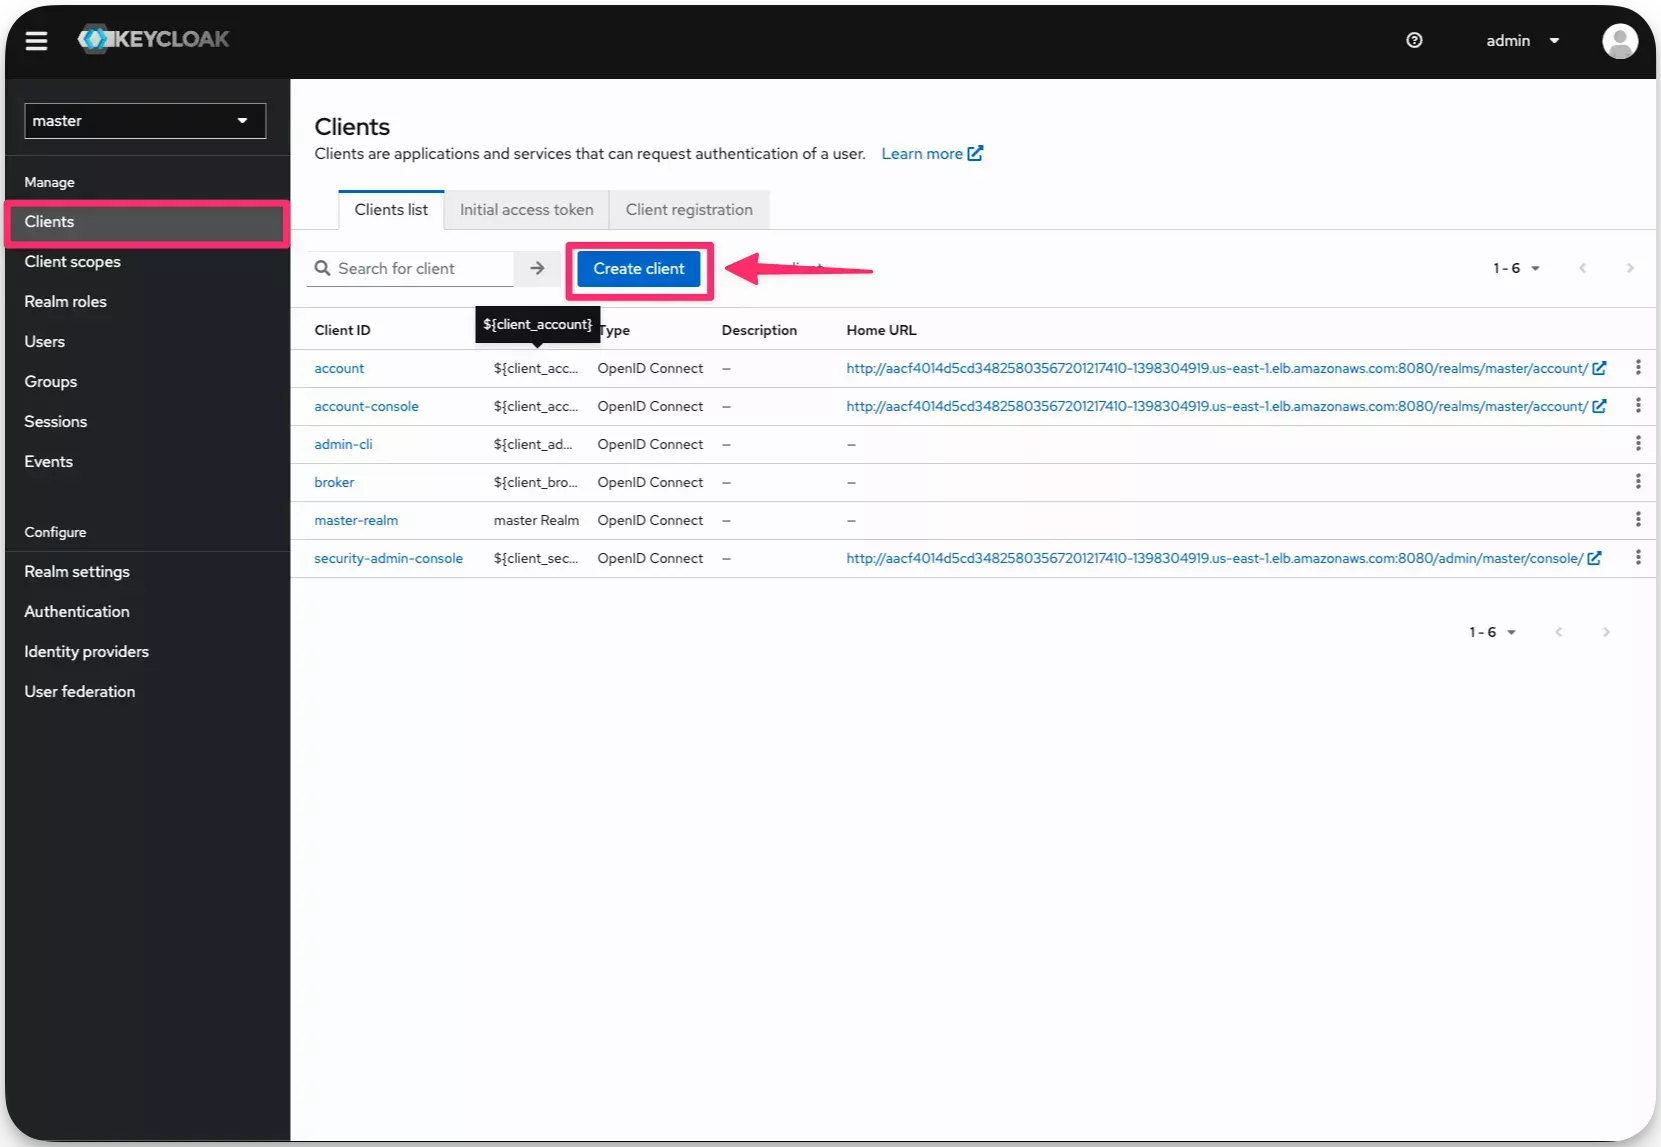
Switch back to the Keycloak admin console and create a client for Palette. Navigate to the left Main Menu and select Clients. Click on the Create button to create a new client.
-
Select Client Type value "OpenID Connect" and fill in the fields Client ID and Name with the value
palette. Click on Next.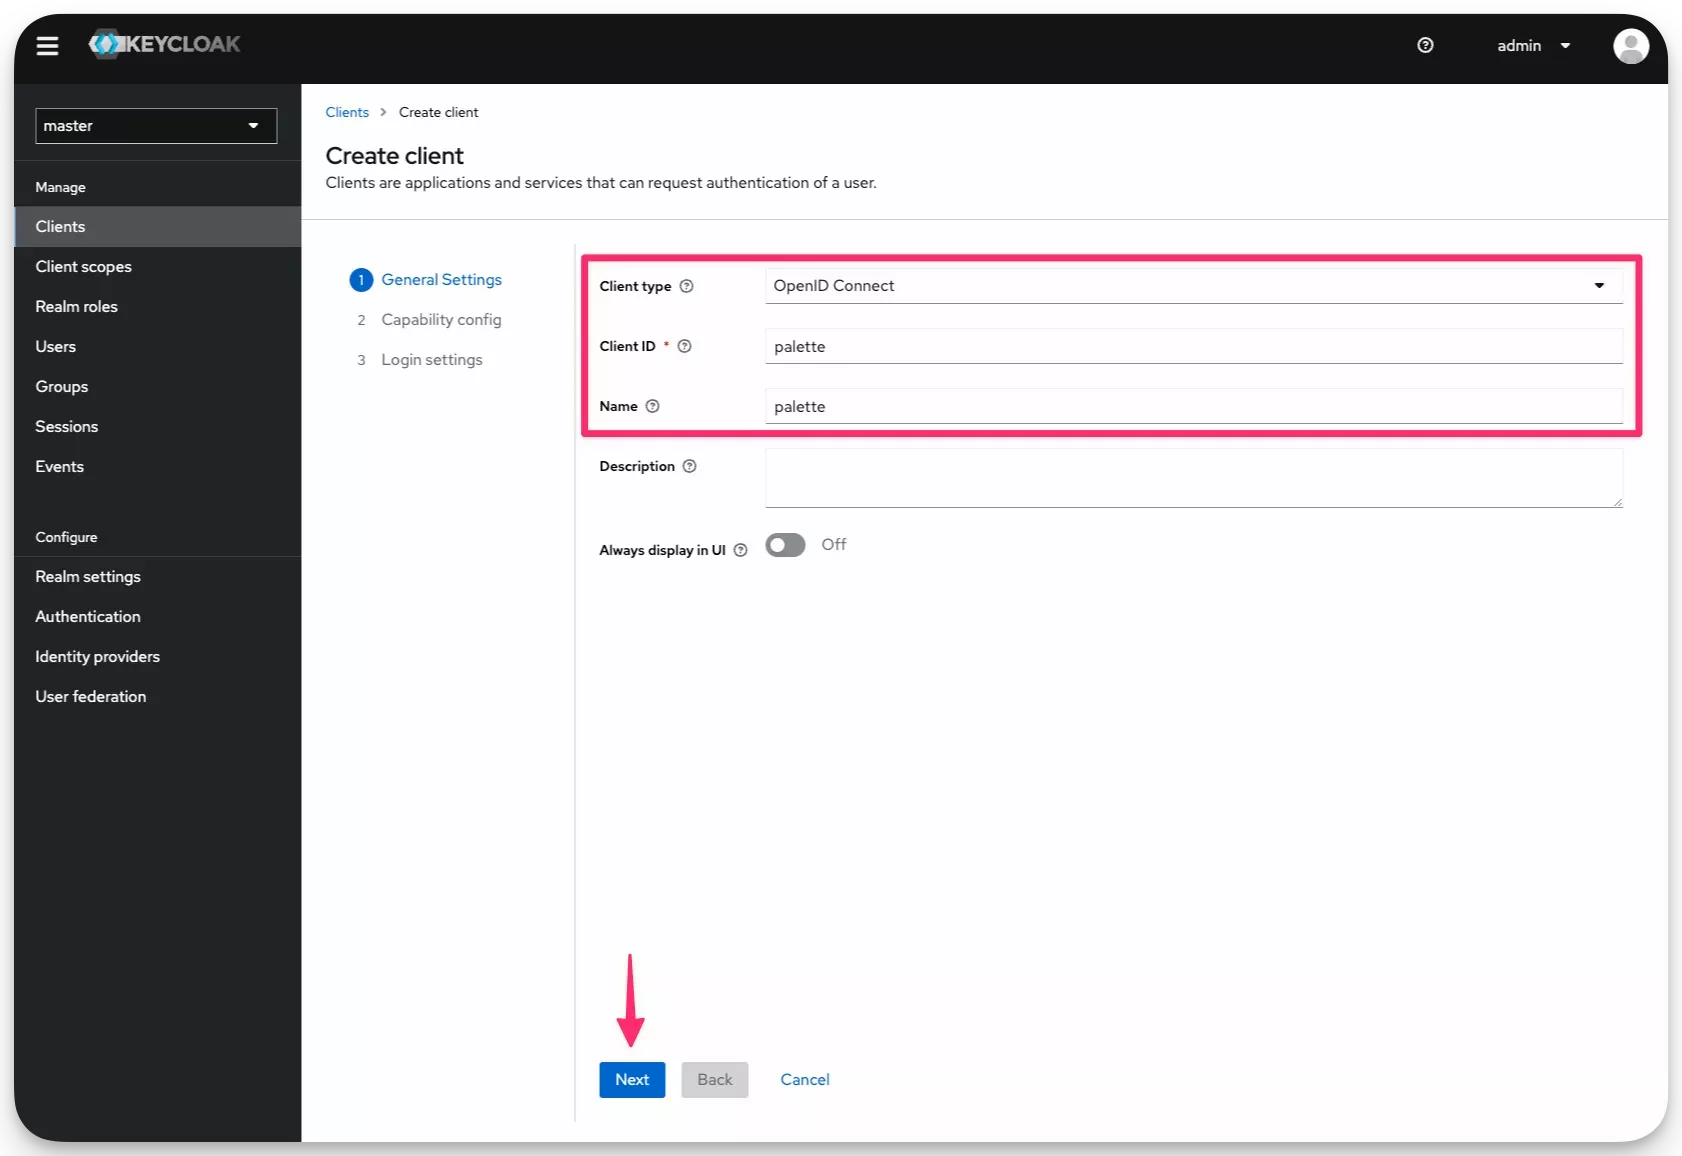
-
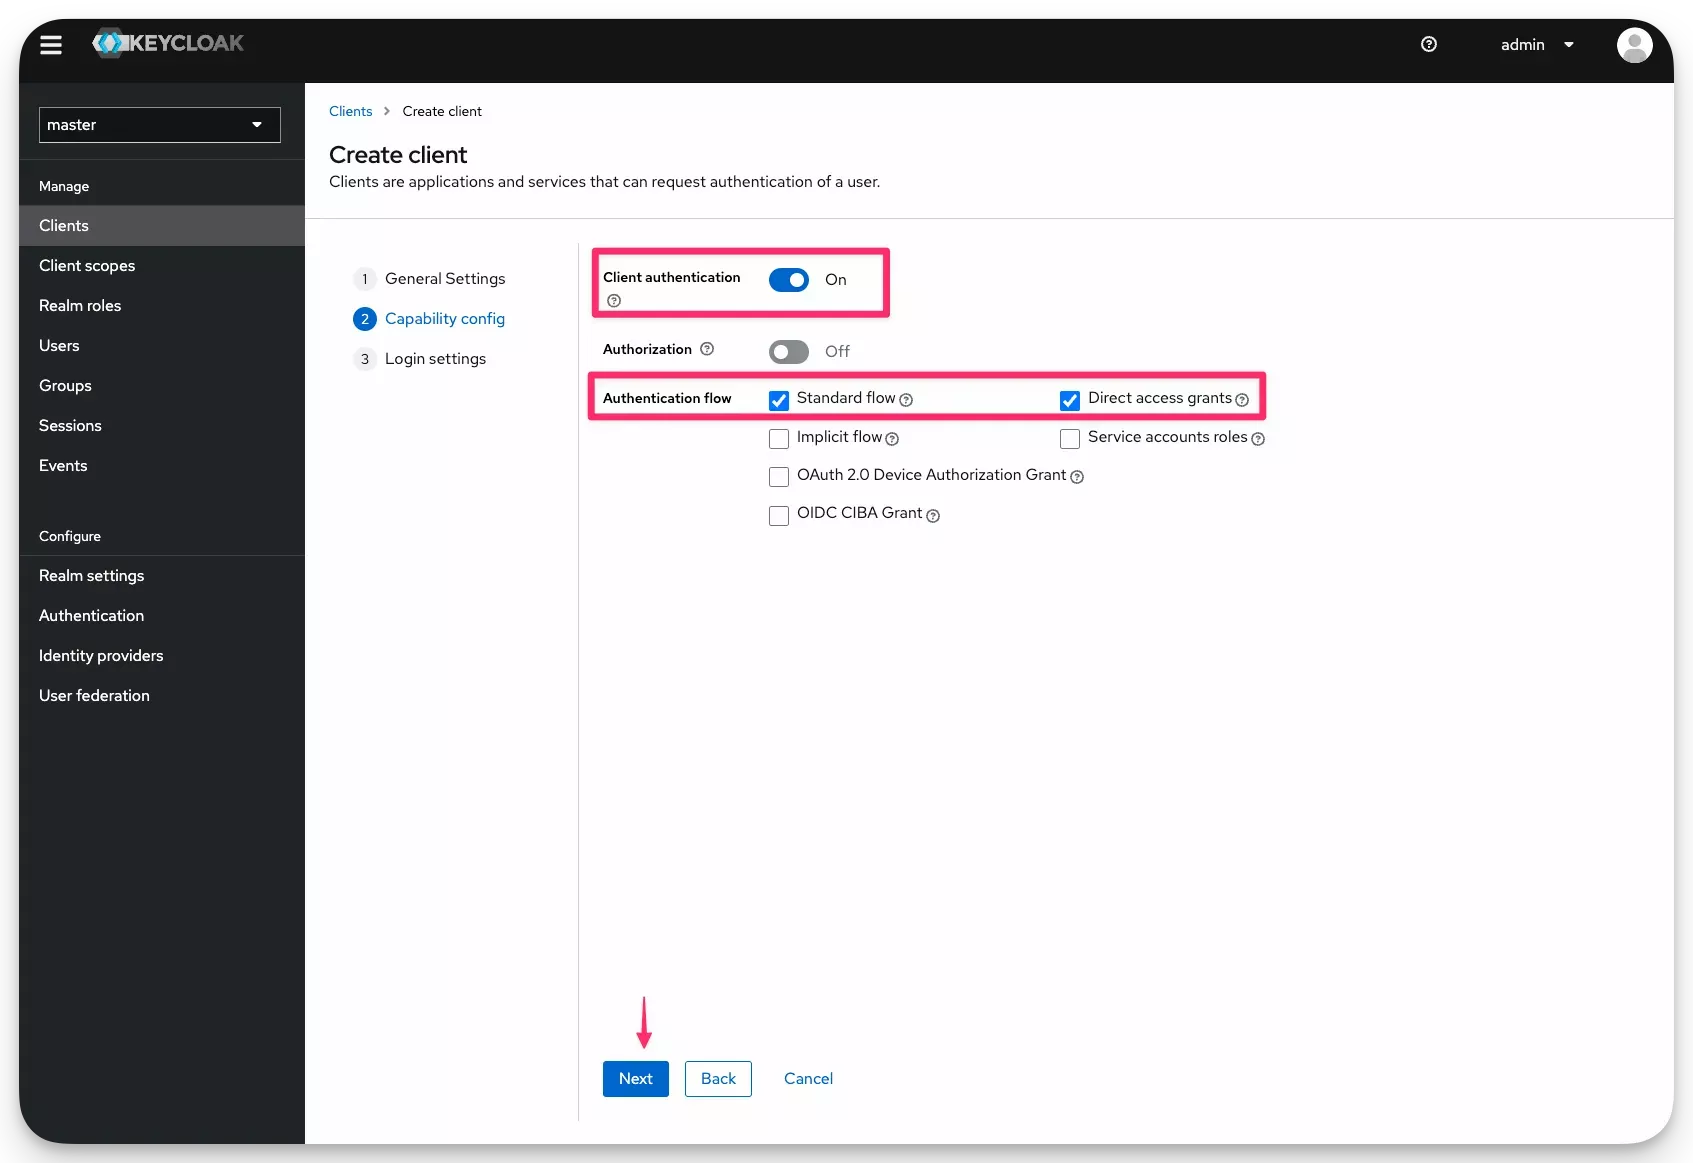
Select Client authentication for increased security and check the Standard Flow box and the Direct Access Grants box. Click on Next.
-
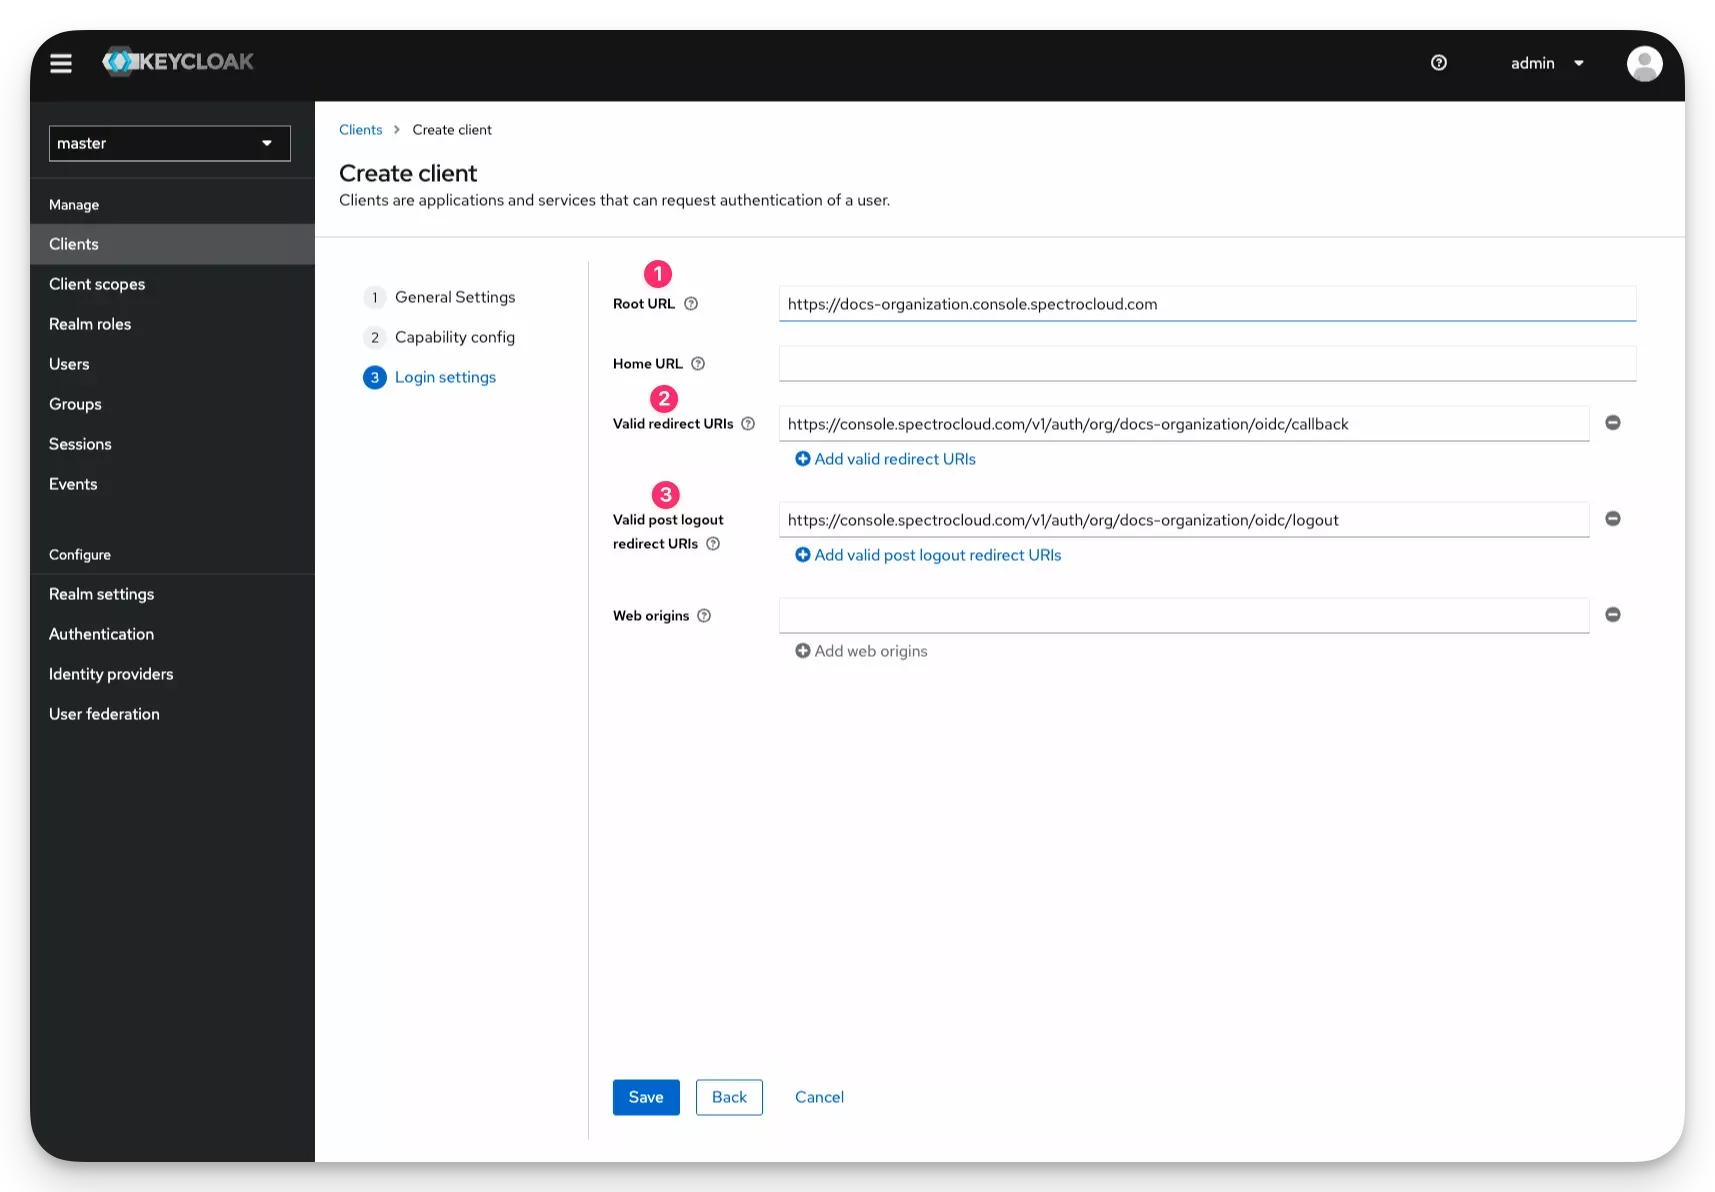
Fill out the following fields with the instructions provided in the table.
Field Description Root URL Your Palette URL. For Palette SaaS, this value is prefixed with your tenant name. For example, https://docs-test.console.spectrocloud.com. For self-hosted Palette, or VerteX, this value is the URL of your Palette deployment.Valid Redirect URIs The callback URL you copied from the Palette SSO configuration page. Valid post logout redirect URIs The logout URL you copied from the Palette SSO configuration page. -
Click on Save to save the client configuration.
-
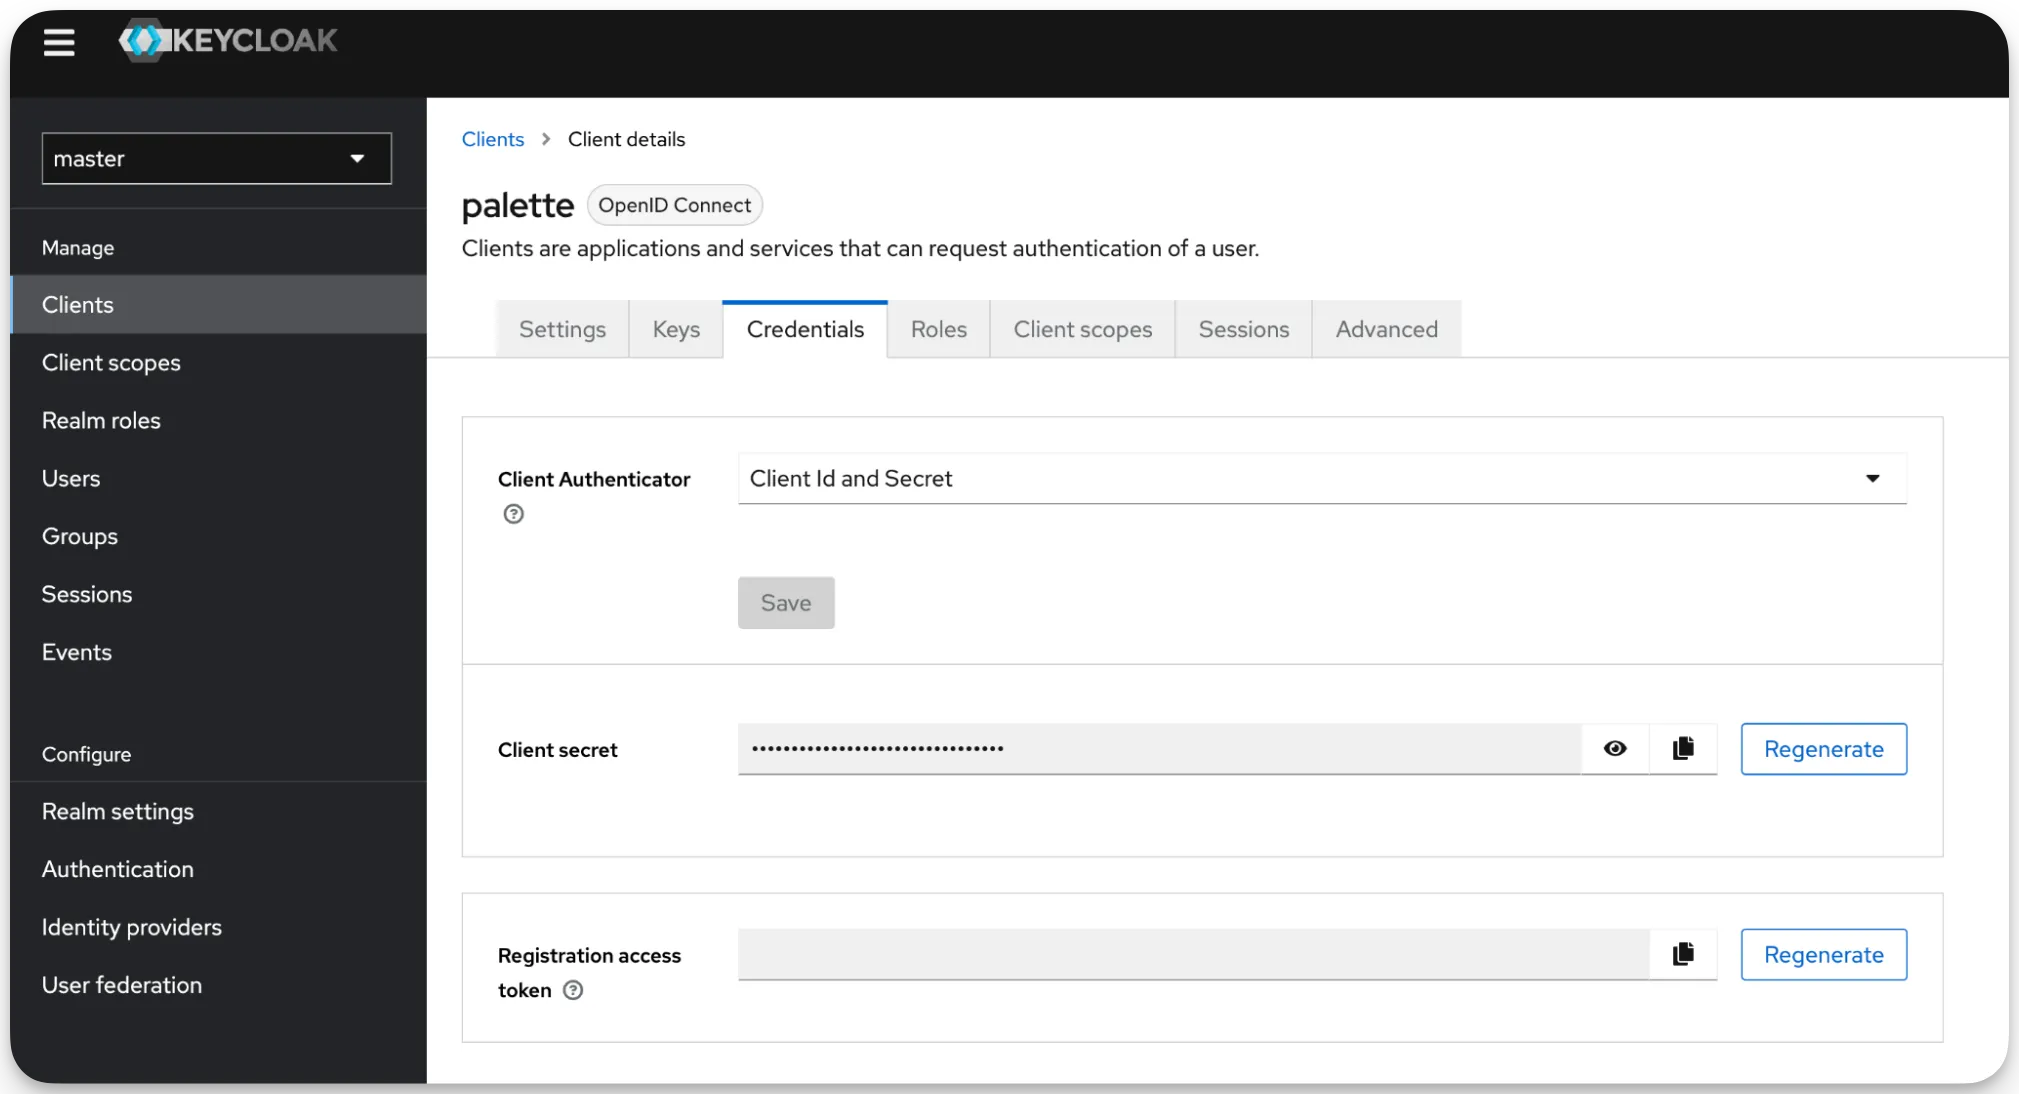
In the following screen, select the Credentials tab to retrieve client secret.
-
Switch back to Palette and paste client secret in the Client Secret field. Fill out the following fields with the instructions provided in the table below.
Field Description Issuer URL Your Keycloak URL with /realms/masterappended to the end. For example,http://keycloak.dmitry.sa.spectrodemos.com:8080/realms/master.Client ID The client ID you created in the previous steps. In this guide, the name palettewas used.Client Secret The client secret you retrieved in the previous step. 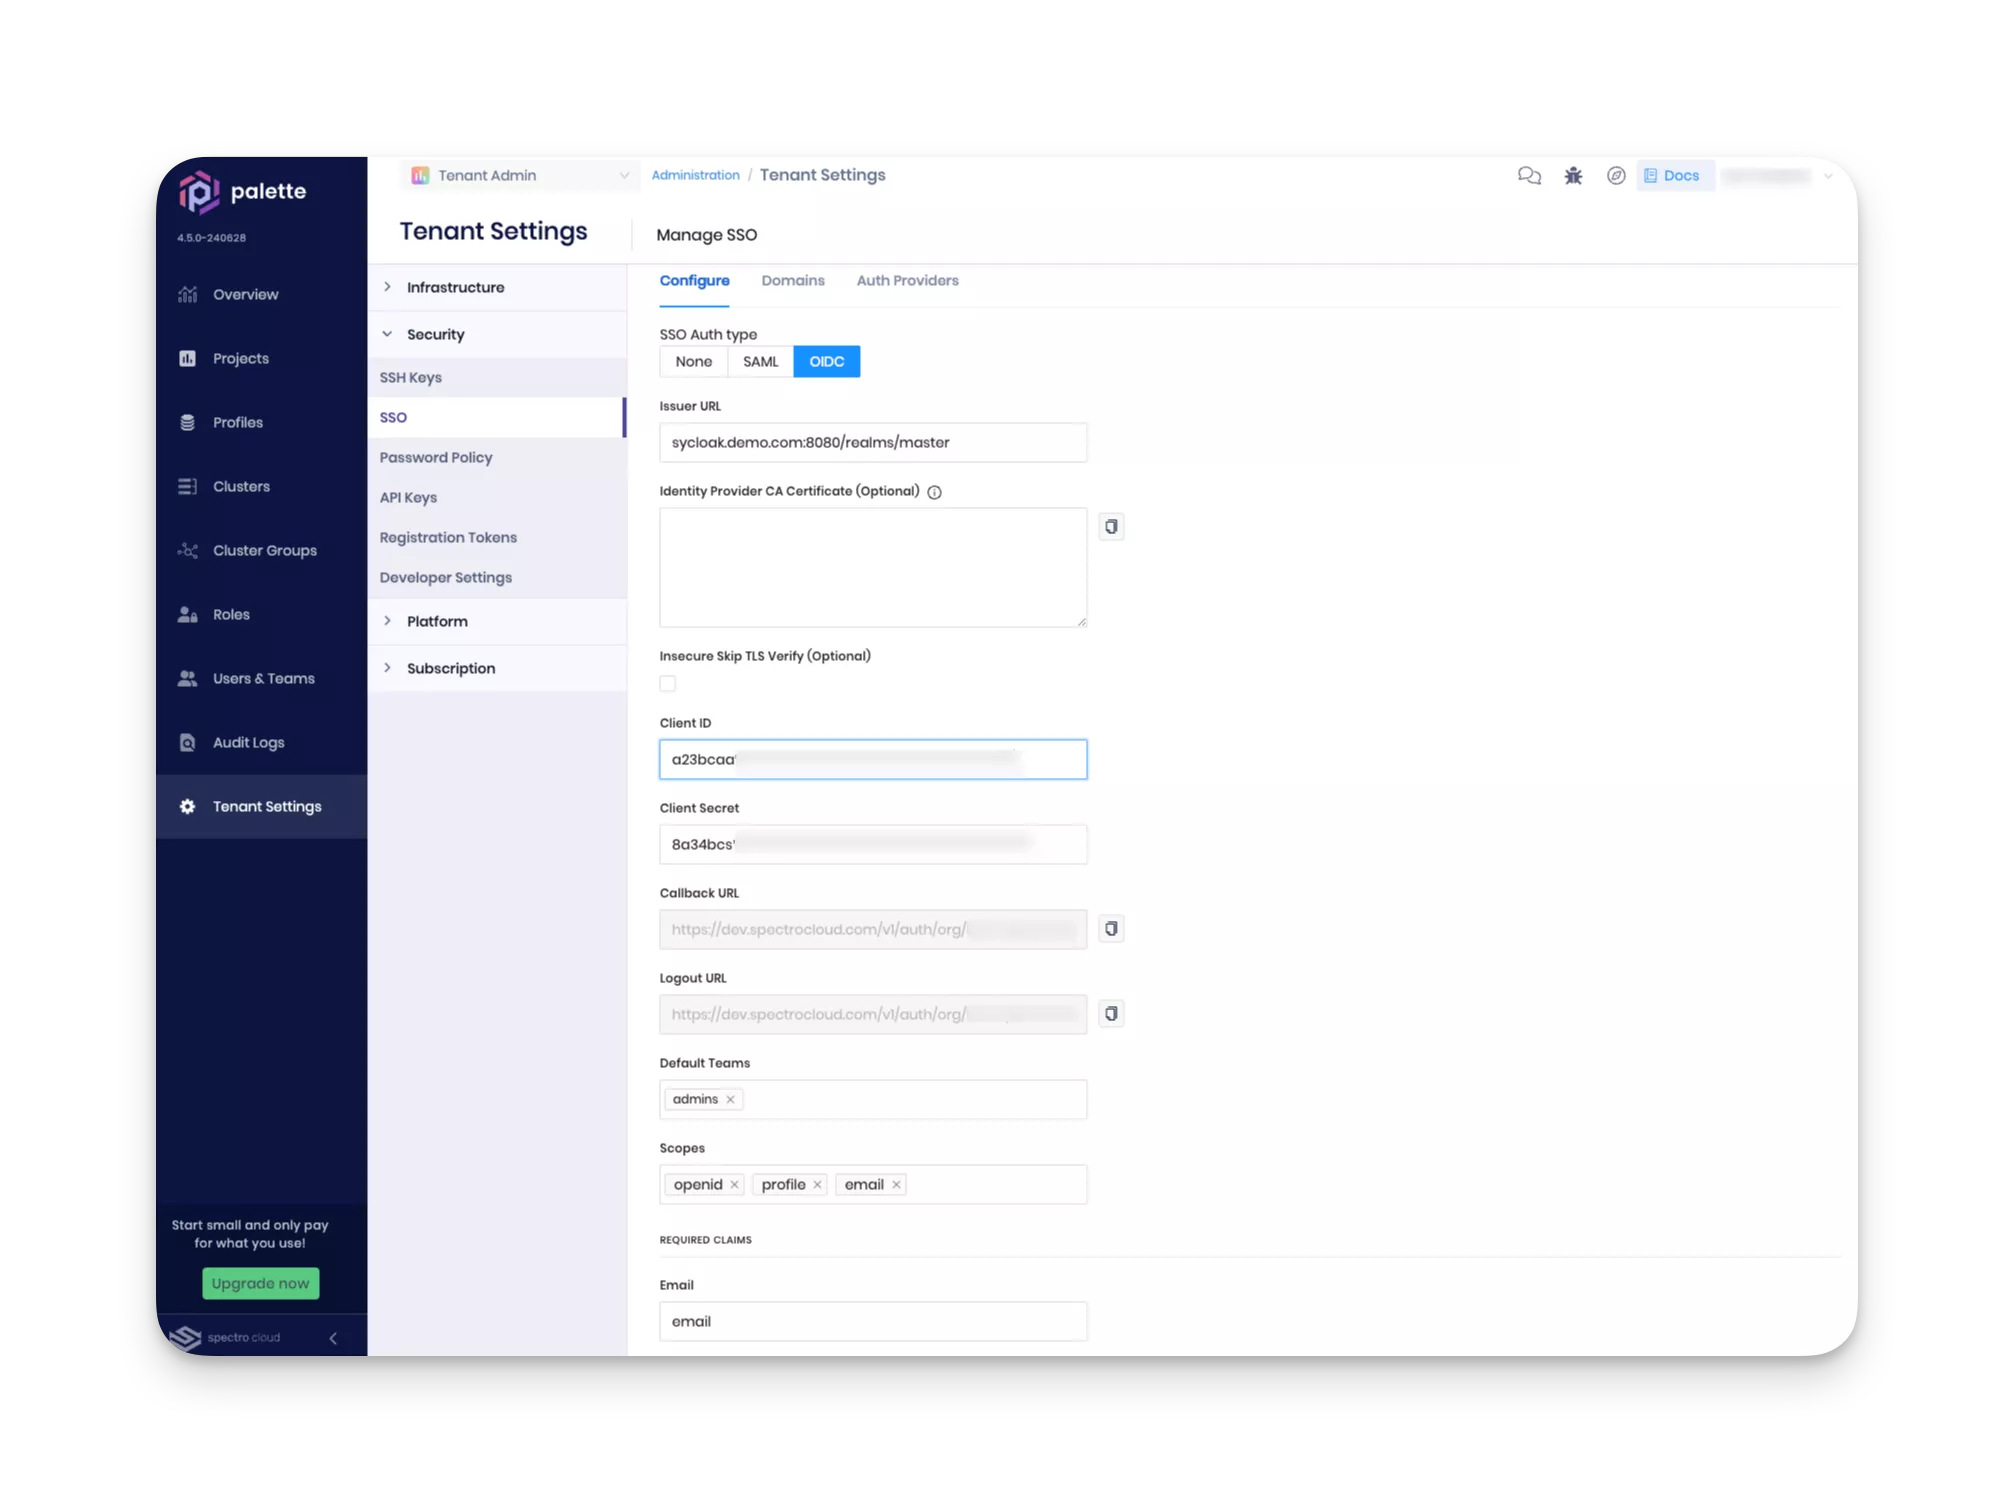
-
Scroll down to the bottom of the page, and click on Enable. If all values are correct, you will receive green message stating "OIDC configured successfully" at the top right corner.
-
Navigate back to the Keycloak admin console. In the left Main Menu, select Users. Fill in first name, second name, and the email address of the admin user.
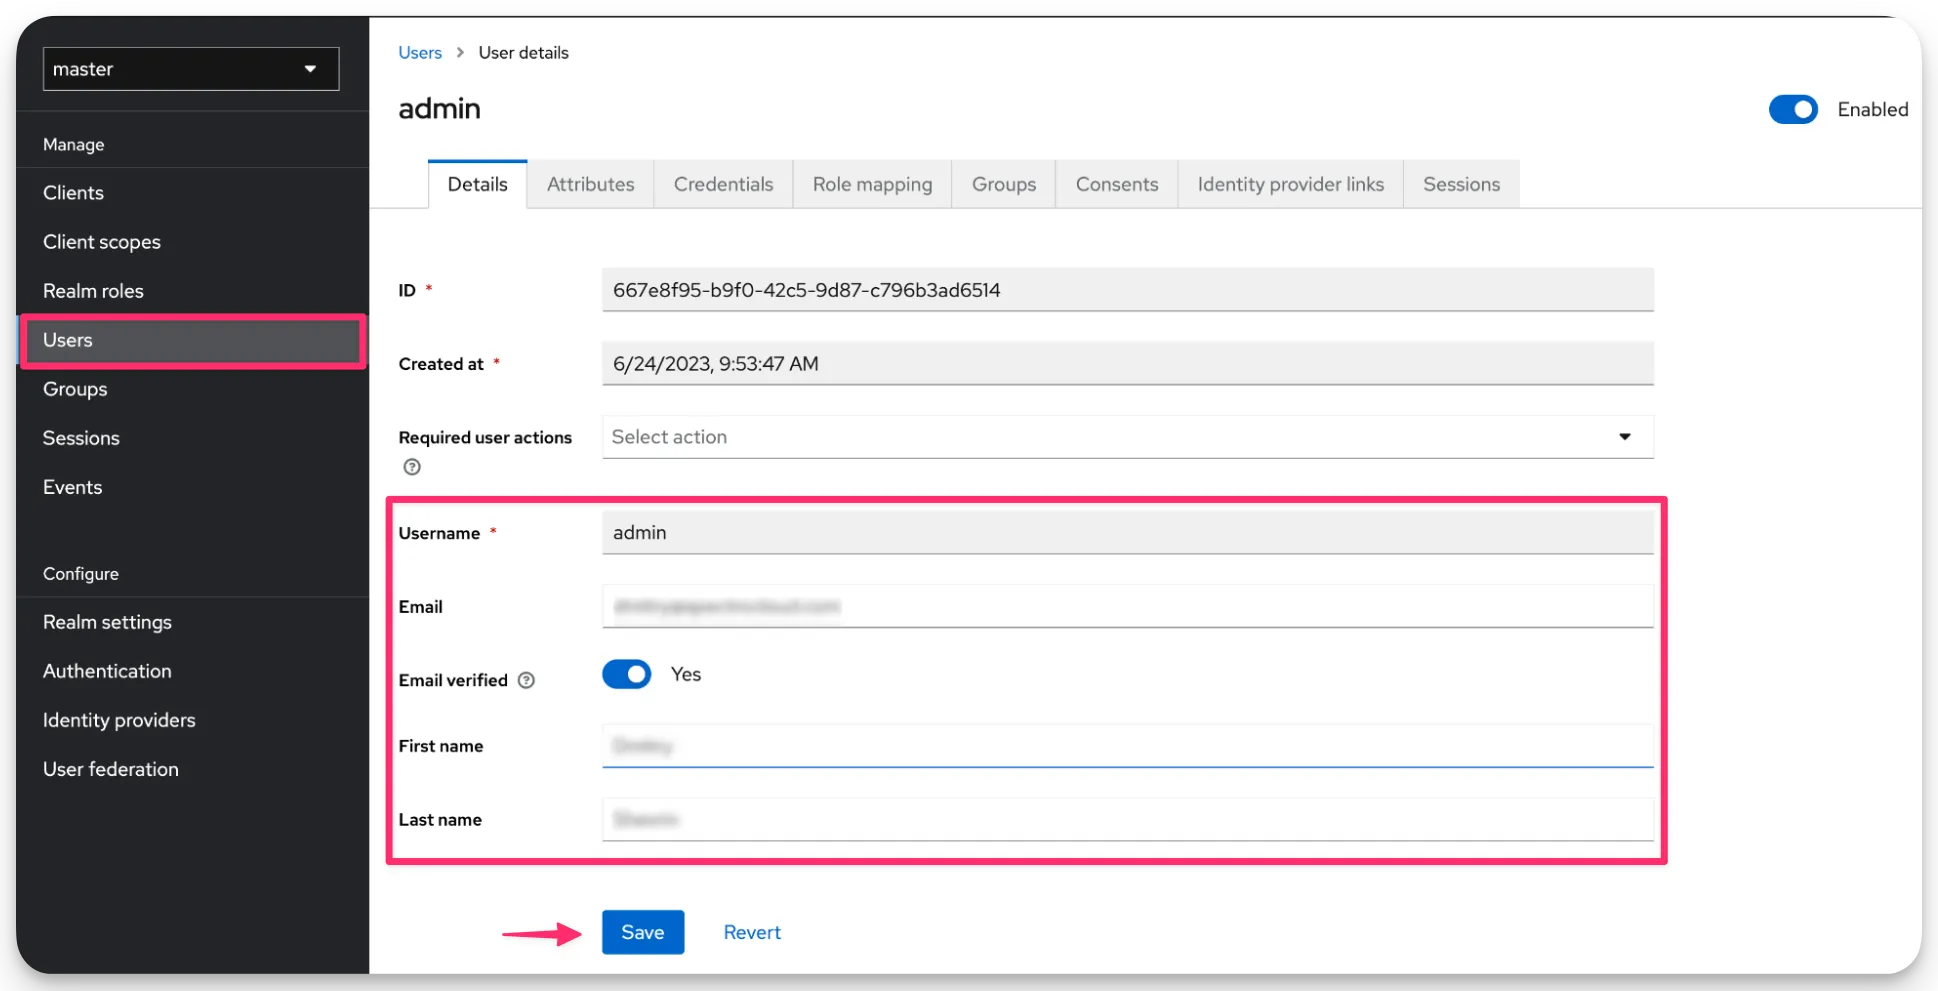
You have now configured SSO for Palette with Keycloak. You can now log in to Palette using the admin user you created in Keycloak. Use the validation steps below to validate the SSO configuration. Check out the Create a Team section to learn how to create a team and assign roles to users.
Validate
Use the following steps to validate the SSO configuration.
-
Log out of Palette. Click on the top right User Menu and select Log out.
-
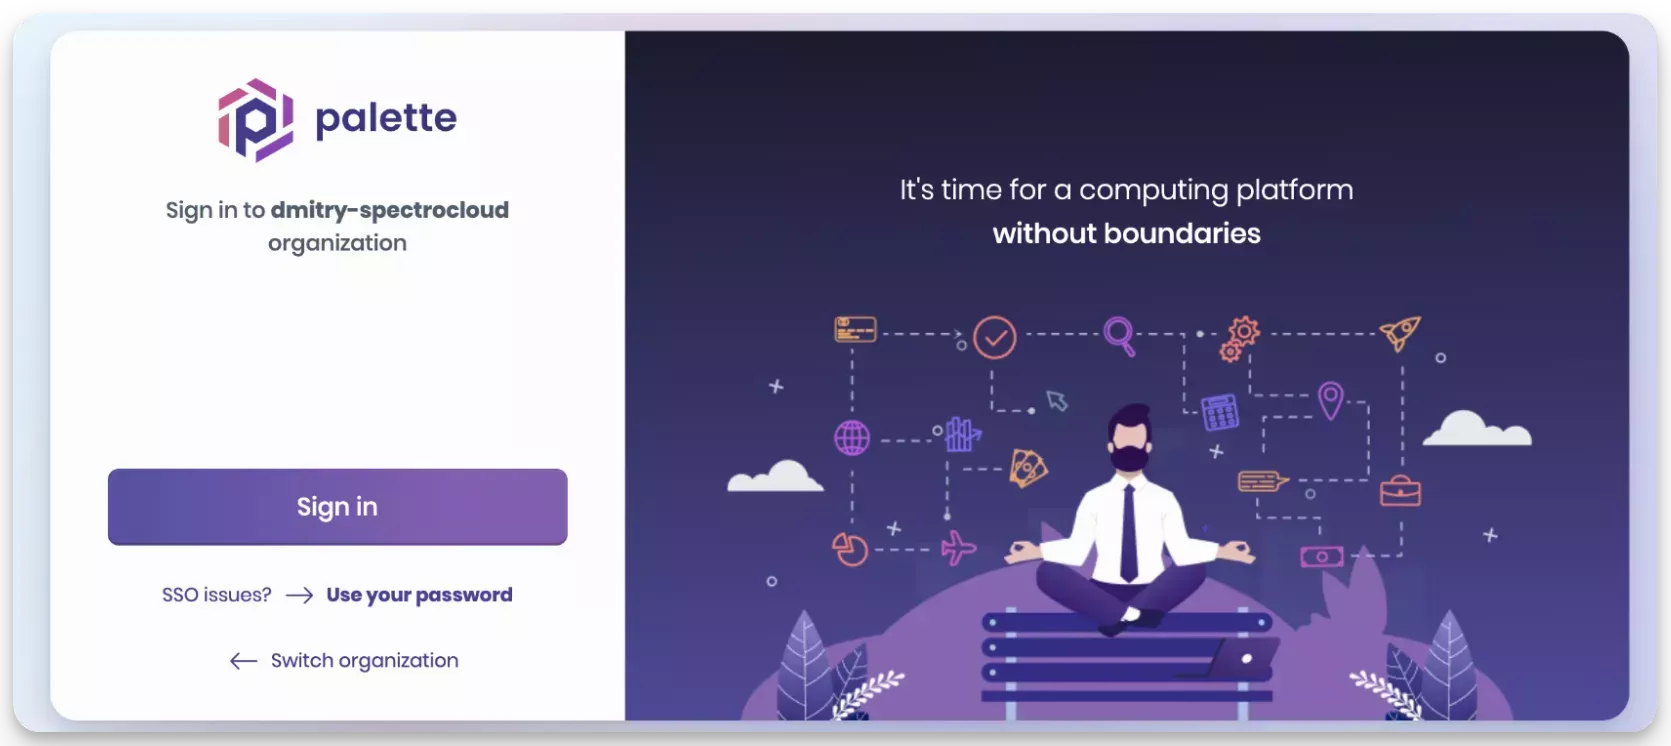
Sign in to Palette using the admin user you created in Keycloak. You will be redirected to the Keycloak login page. Enter the credentials for the admin user you created in Keycloak.

-
Upon successful authentication, you will be redirected to Palette. You will be logged in to Palette as the admin user you created in Keycloak.
Create a Team
-
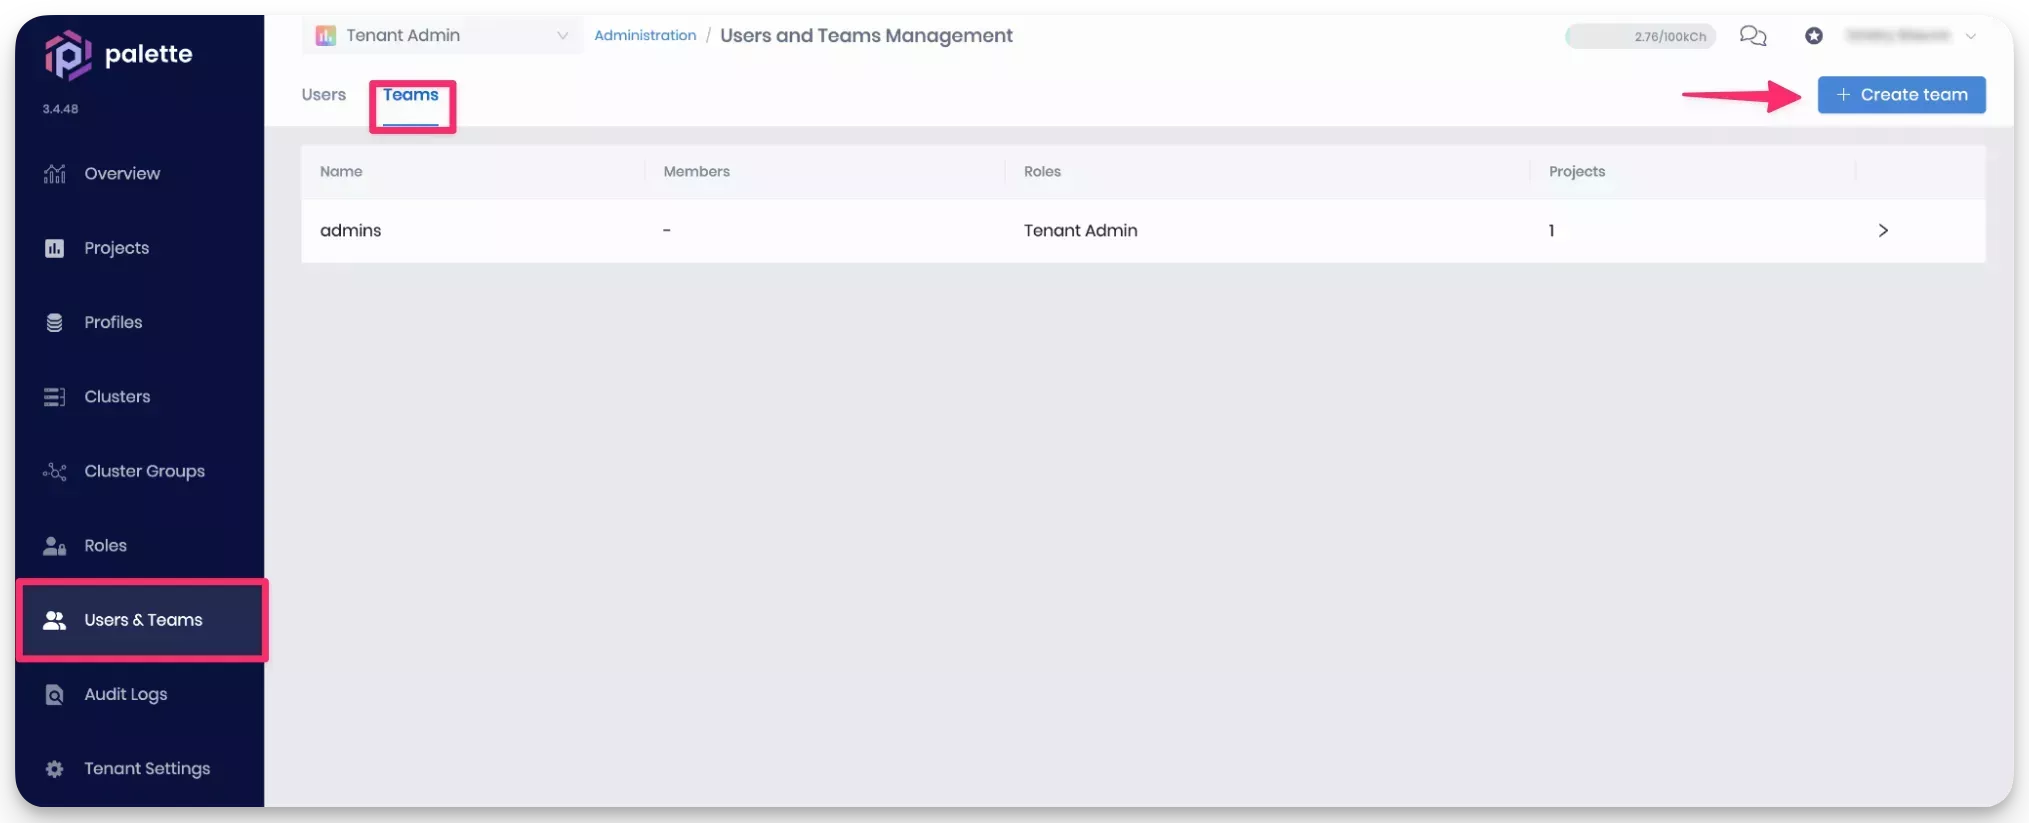
Log in to Palette as a Tenant Admin. Navigate to the left Main Menu and select Users & Teams. Click on the Teams tab to access the Teams page. Click on the Create Team button to create a new team.
-
Provide a team name, such as
adminsbut leave the Members field empty. Click on Confirm to create the team. -
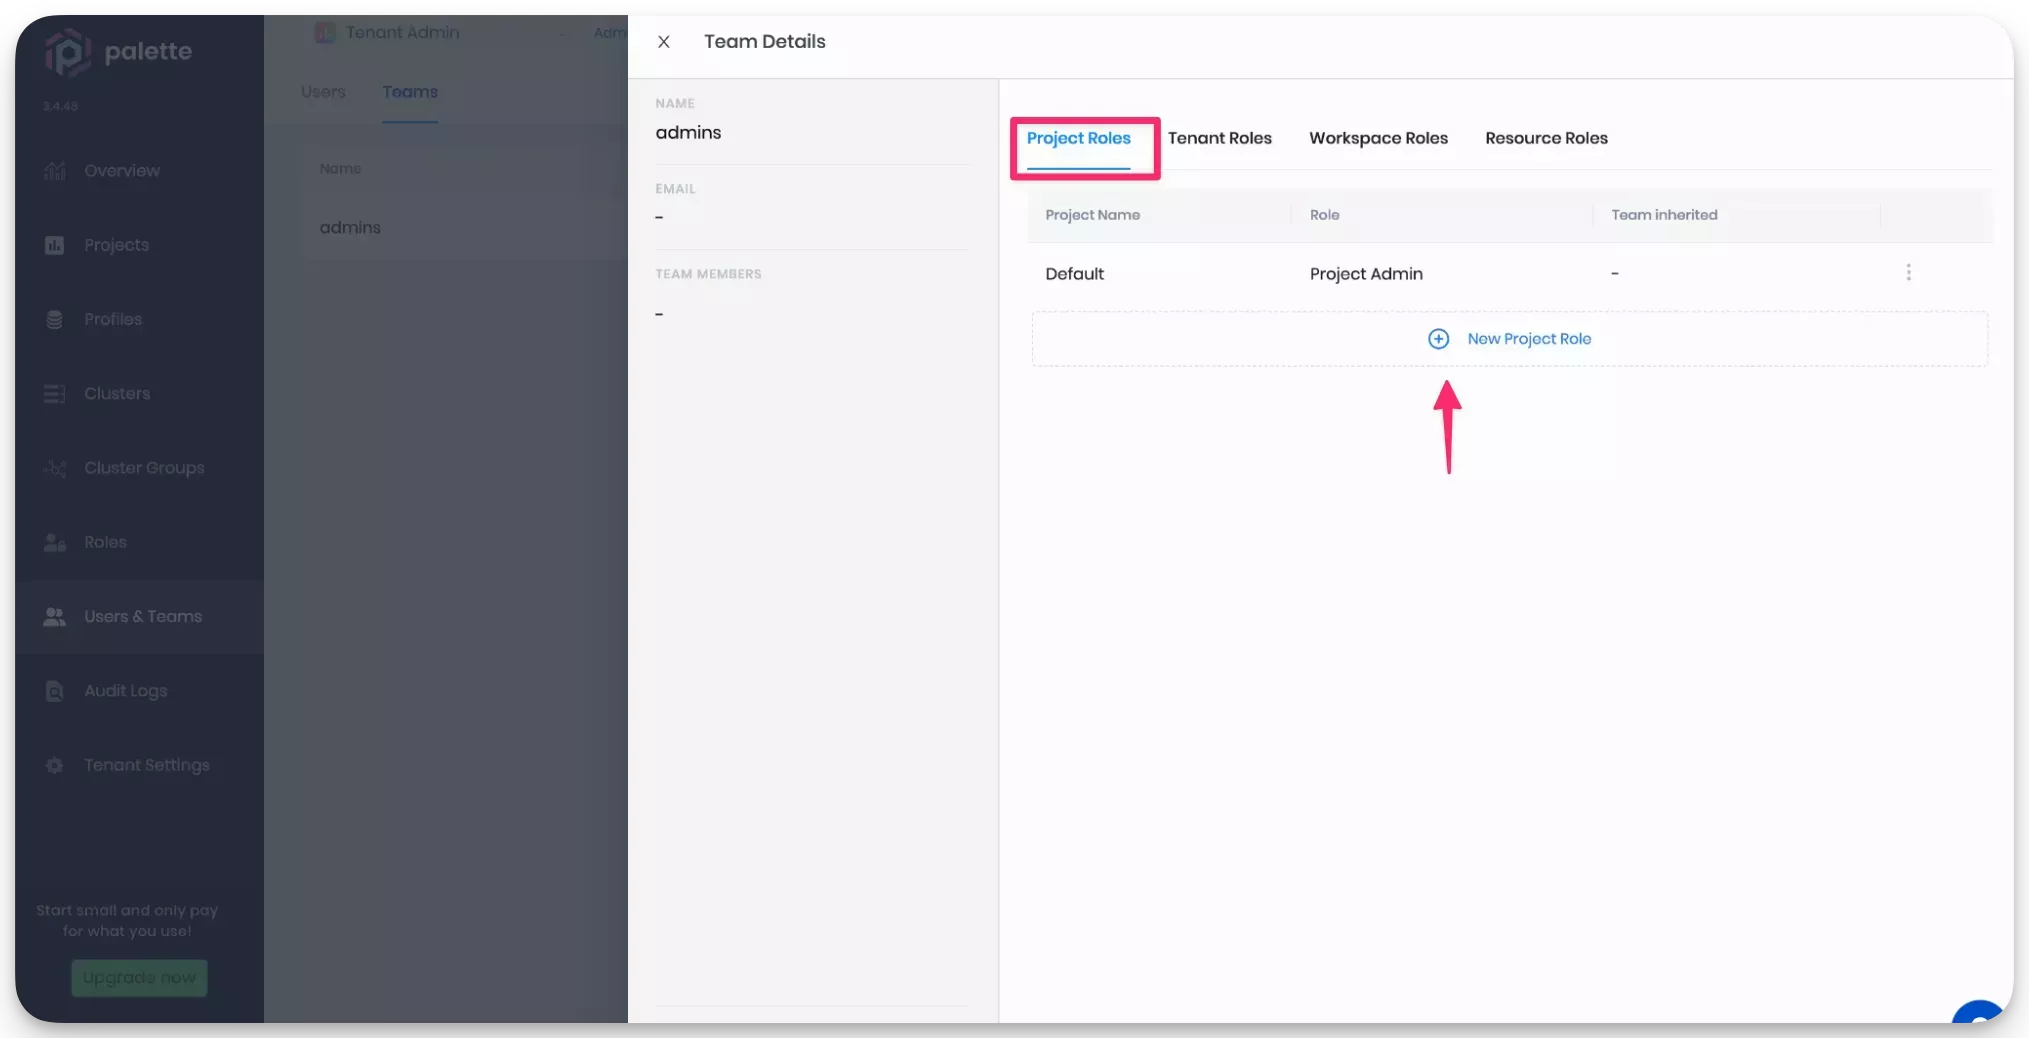
Next, select the admins row to access the team settings page. Click on New Project Role and add the Project Admin role to the Default project. Click on Confirm to save the changes.
-
From the left Main Menu, select Tenant Settings. Next, click on SSO to access the SSO configuration page. Click on the OIDC tab to access the OIDC configuration page. Scroll down to the SSO Admins section and select the admins team from the Default Team drop-down Menu. Click on Save.
-
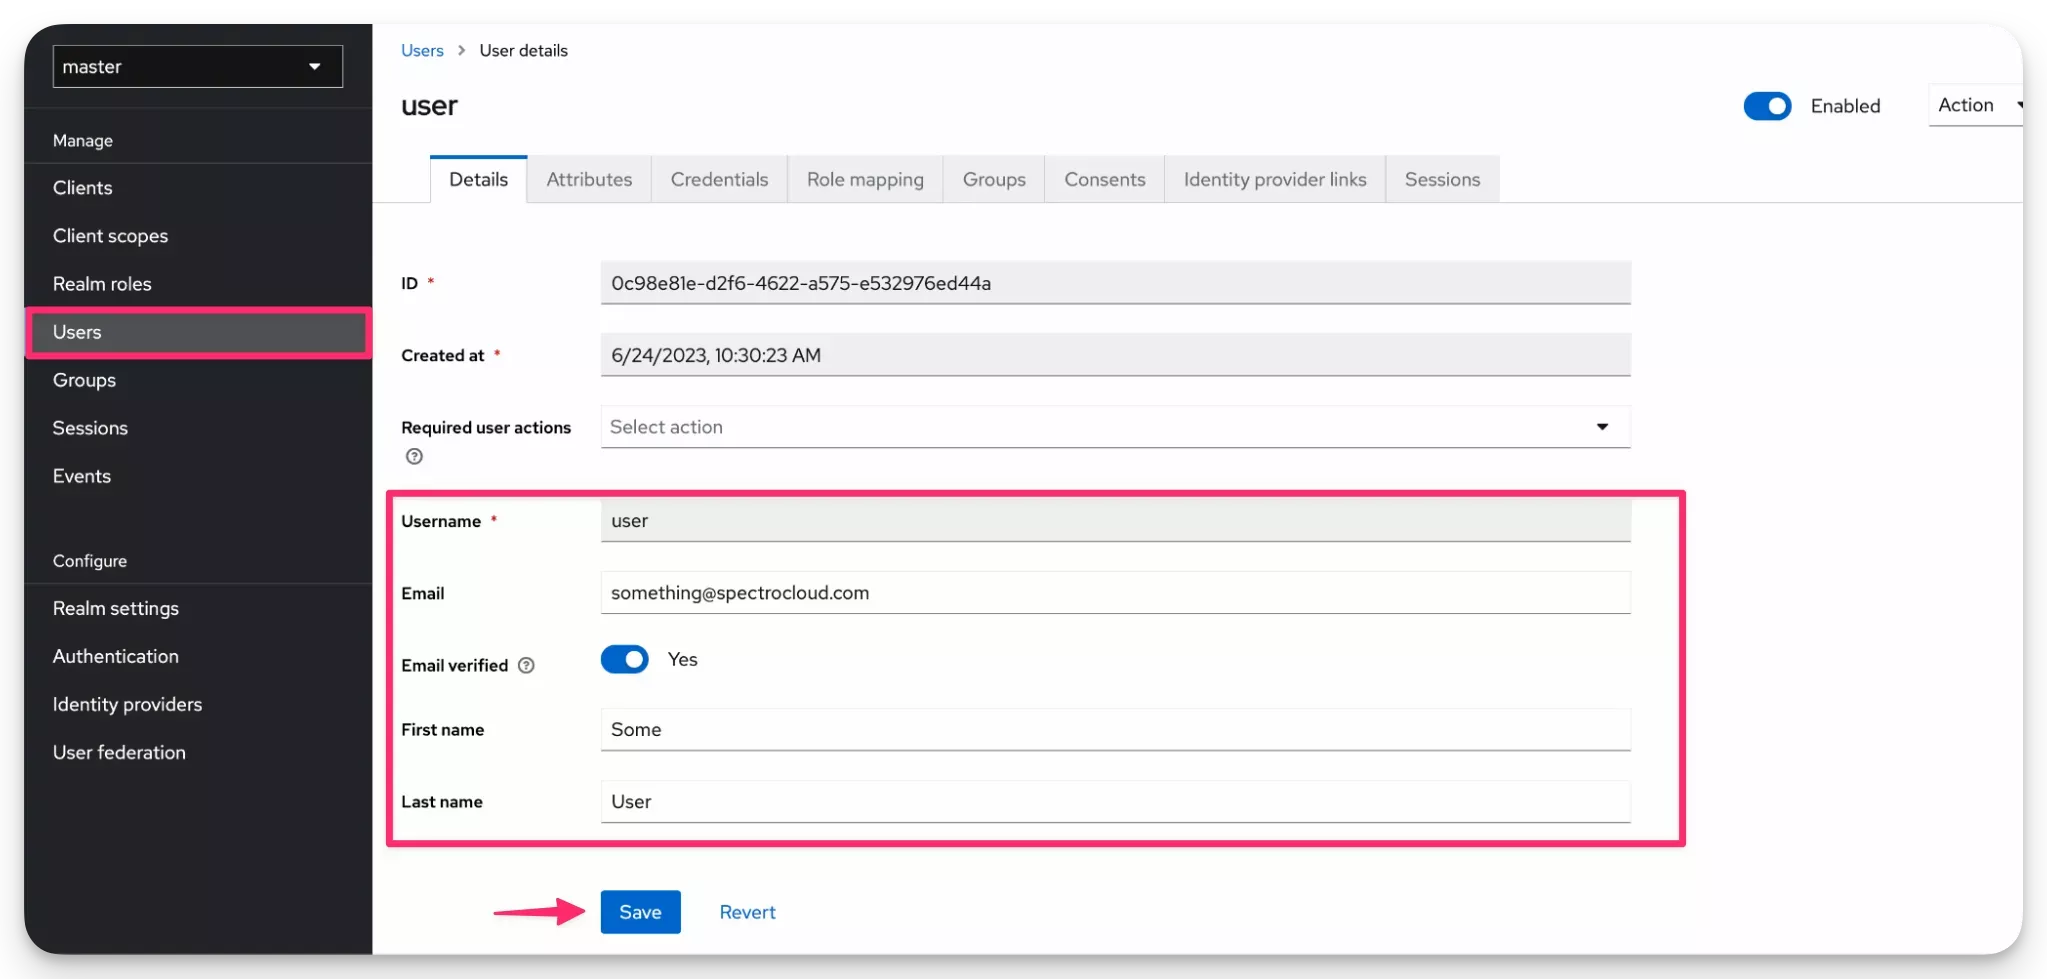
Navigate back to the Keycloak admin console. From the left Main Menu click on Users. Create a user and ensure the field Username, Email, and First Name are filled out. Click on Save to save the user.
-
Next, click on the Credentials tab and assign the user password.
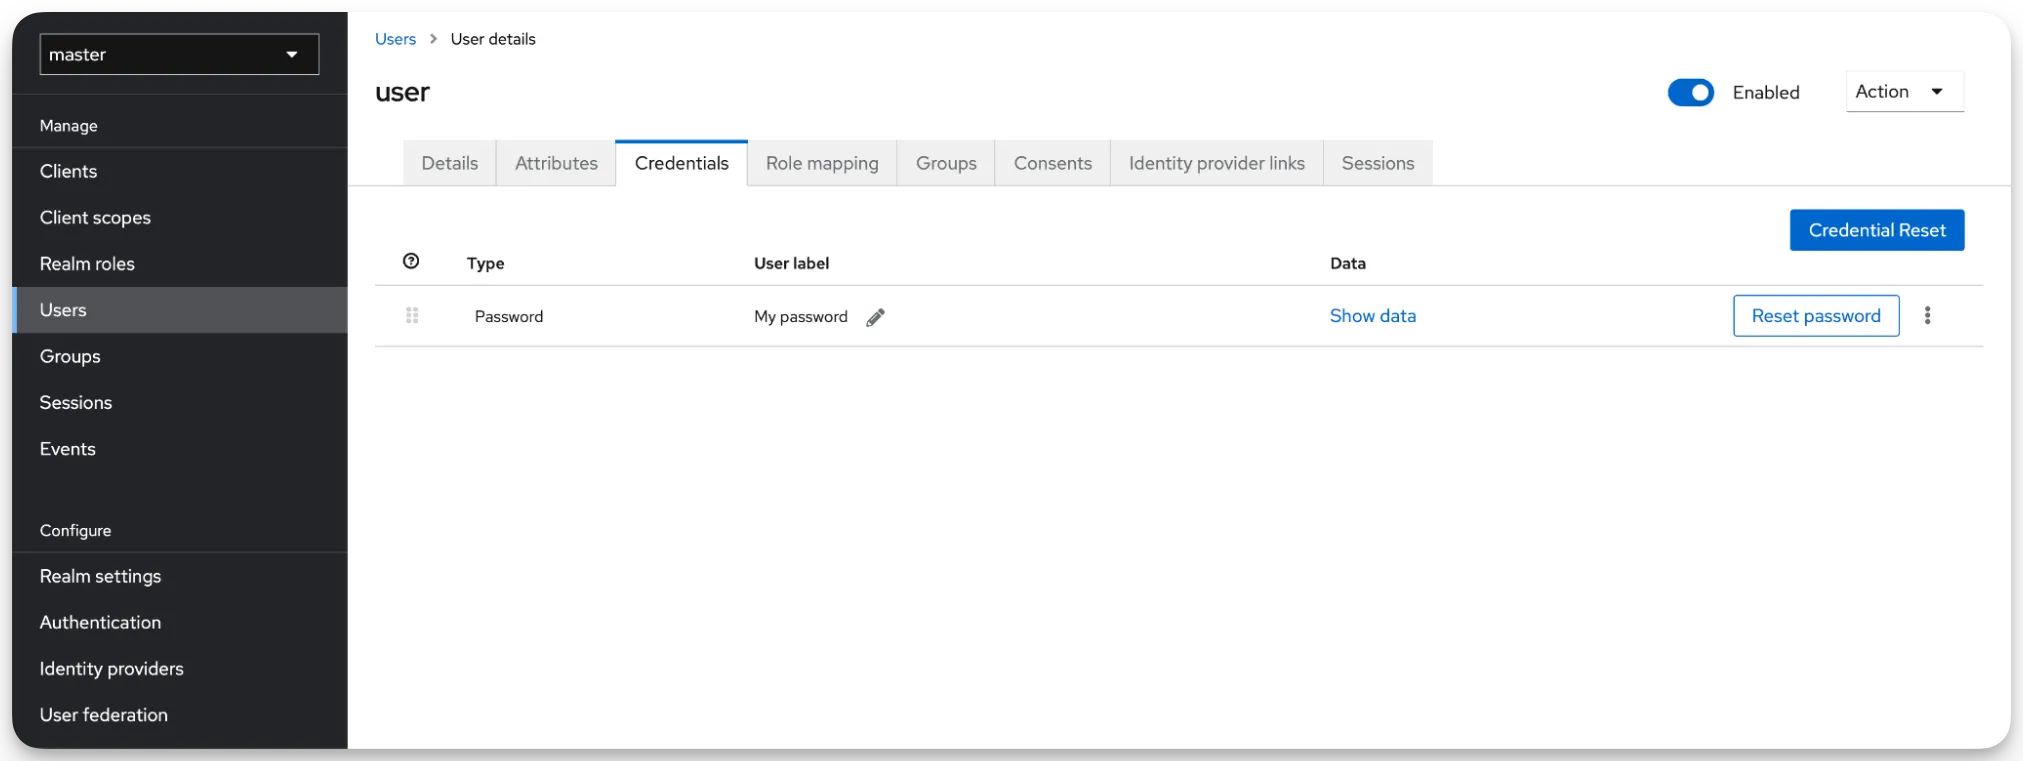
Repeat the steps above for all users you want to add to the admins team. You can now log in to Palette with the users you created in Keycloak. The users will be assigned the Project Admin role for the Default project. Check out the Creating users guide to learn how to create users in Keycloak.